
Custom Windows 365 Images with Nerdio
If you've ever managed golden images for virtual desktops, you know the drill. What starts as "just build a VM and sysprep it" quickly turns into a sprawling process of updates, app installations, optimizations, and versioning headaches. Whether you're building images for Windows 365, Azure Virtual Desktop, or any other VDI platform, creating and maintaining them at scale is genuinely a challenge.
There's no shortage of approaches to tackle this. On one end, you have fully automated pipelines using Azure Image Builder or HashiCorp Packer, driven by code and CI/CD. On the other, there's the classic manual route: spin up a VM, configure it by hand, capture, and hope you documented every step. Somewhere in between sits a growing category of semi-automated tooling that tries to balance flexibility with repeatability.
This is where Nerdio enters the picture. If you're already using Nerdio Manager to handle your Windows 365 or AVD environment, its built-in image management is hard to ignore. It gives you a guided, UI-driven workflow to create, customize, and version images. No code required, but no sacrifice in structure either. You get scripted actions, application installations, and Windows Update integration, all wrapped in a process that's repeatable and easy to hand off to a colleague.
In this post, I'll walk you through how I use Nerdio to create custom Windows 365 images, step by step, with plenty of screenshots along the way. Of course, you could do the same thing for Azure Virtual Desktop as usual.
If you are interested in creating images using HashiCorp Packer, then checkout my other blog posts:

Requirements
Before we get started, make sure you have the following in place:
- Nerdio Manager for Enterprise deployed and connected to your Azure tenant including the required permissions for Microsoft Intune
- At least one Windows 365 license, along with its license prerequisites (Microsoft Entra ID P1, Microsoft Intune, ...)
Source: Windows 365 requirements
Custom Image Requirements
Windows 365 supports both gallery images provided by Microsoft and custom images you upload yourself. If you go the custom route, your image needs to meet a few specific requirements:
- Windows 10 or Windows 11 Enterprise (supported versions only)
- Generation 2 (Gen2) VM image
- Generalized (sysprepped) and single-session only
- Must not have been previously joined to Active Directory, Microsoft Entra ID, or enrolled in Intune
- Default 64 GB OS disk size (automatically adjusted to match your Windows 365 license SKU)
- No attached data disks, no recovery partition
- No FSLogix components and no more than 3,000 apps in the Start menu
The image must exist in an Azure subscription and be stored as a managed image or in an Azure Compute Gallery. You can upload up to 20 custom images to Intune.
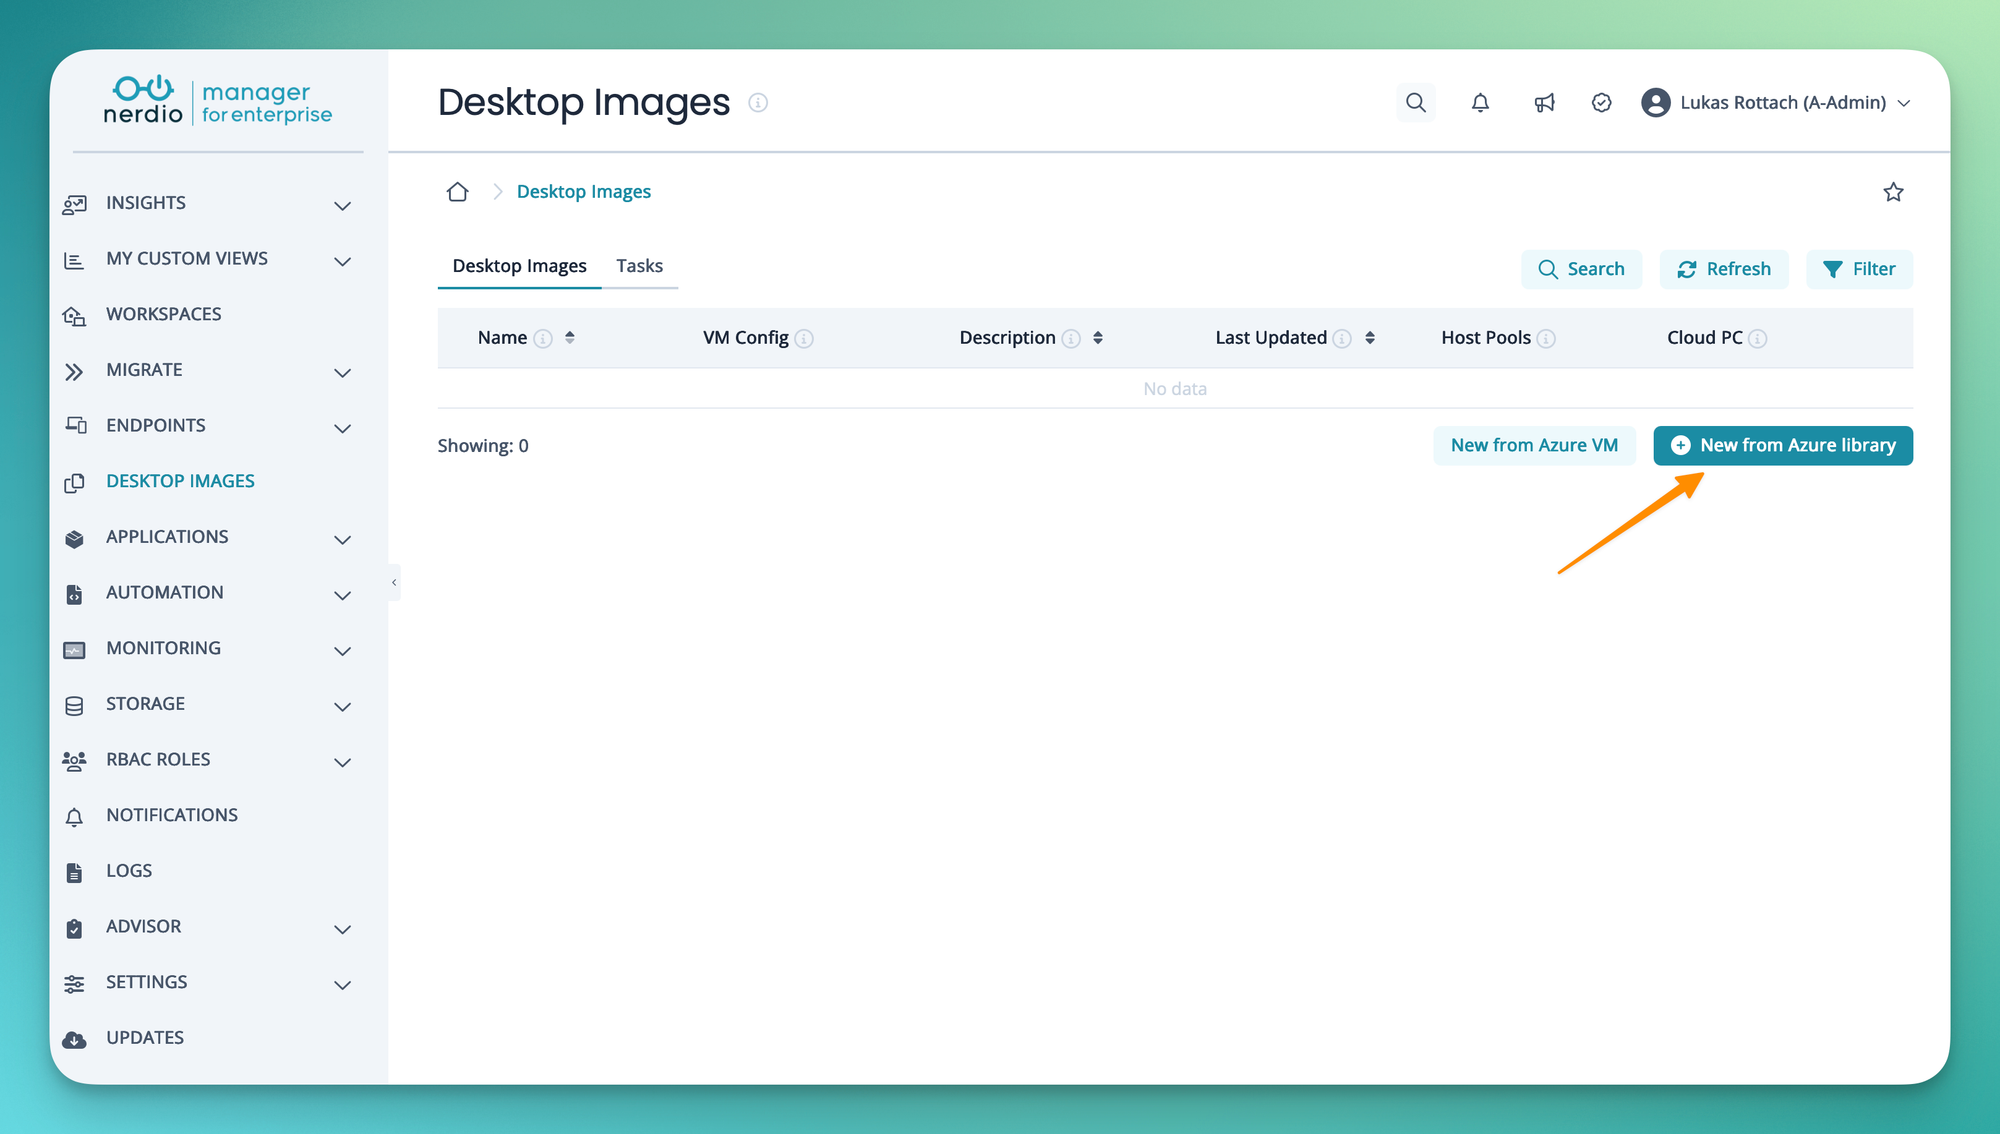
Image Creation
Alright, let's jump right in. To start we navigate right into that beautiful Desktop Images menu in Nerdio. In my case I am going to start creating a new image from the Azure marketplace. Of course we could also use an existing Azure VM, but keep in mind the requirements and limitations mentioned above.
In the next form, enter some basic information about your image VM like name, description, network information and so on. In my case, I've decided to choose a Windows 11 Enterprise Cloud PC image template as Azure Image from the marketplace.
Windows 11 Enterprise Cloud PC images from the Azure Marketplace are officially recommended by Microsoft as a starting point for building custom Windows 365 images. They come with Cloud PC-specific optimizations out of the box. More details here: https://learn.microsoft.com/en-us/windows-365/enterprise/device-images#custom-images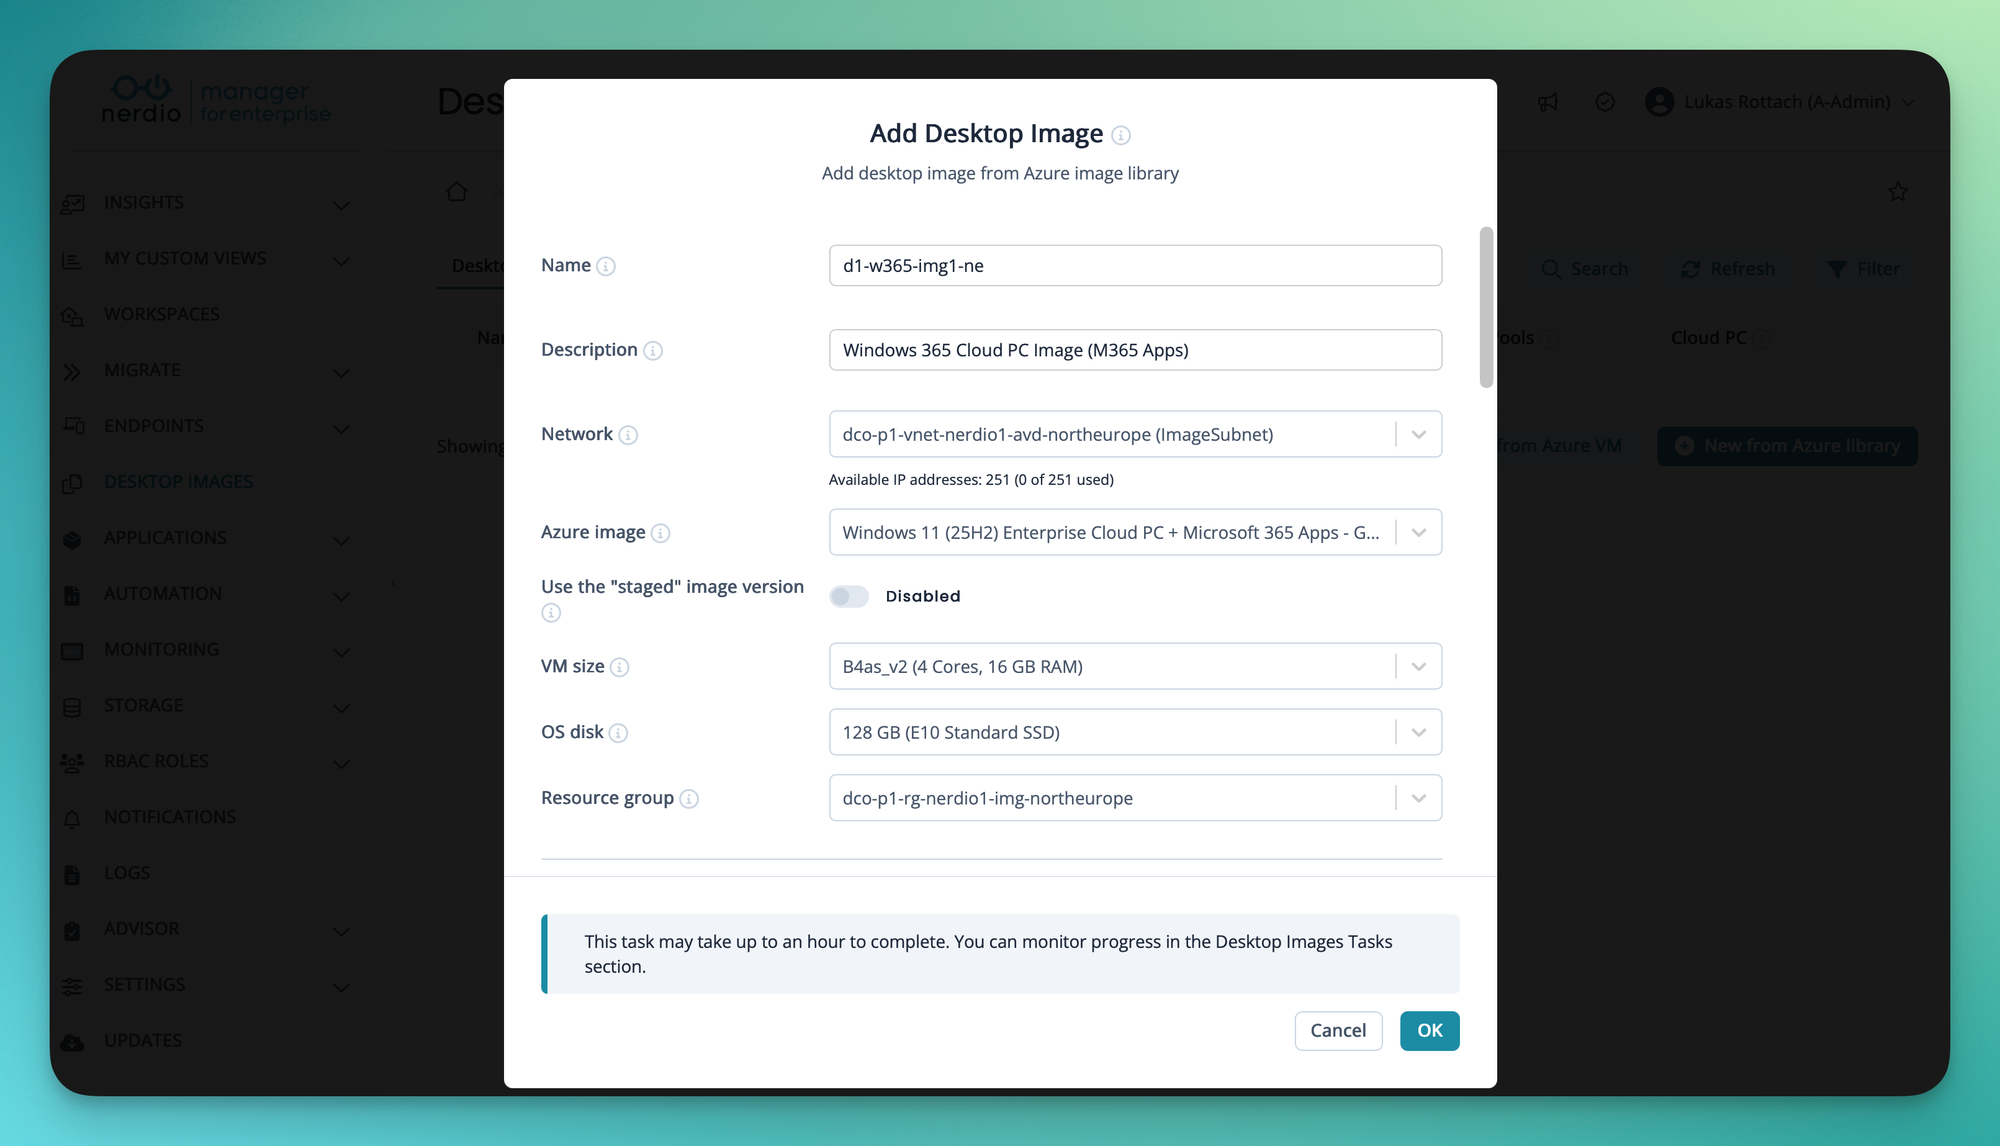
The real magic happens as soon as we scroll down and check the Enable for Cloud PCs option. Here we tell Nerdio that we want to upload this image to Microsoft Intune (Windows 365 service) to use it later from within our provisioning policies.
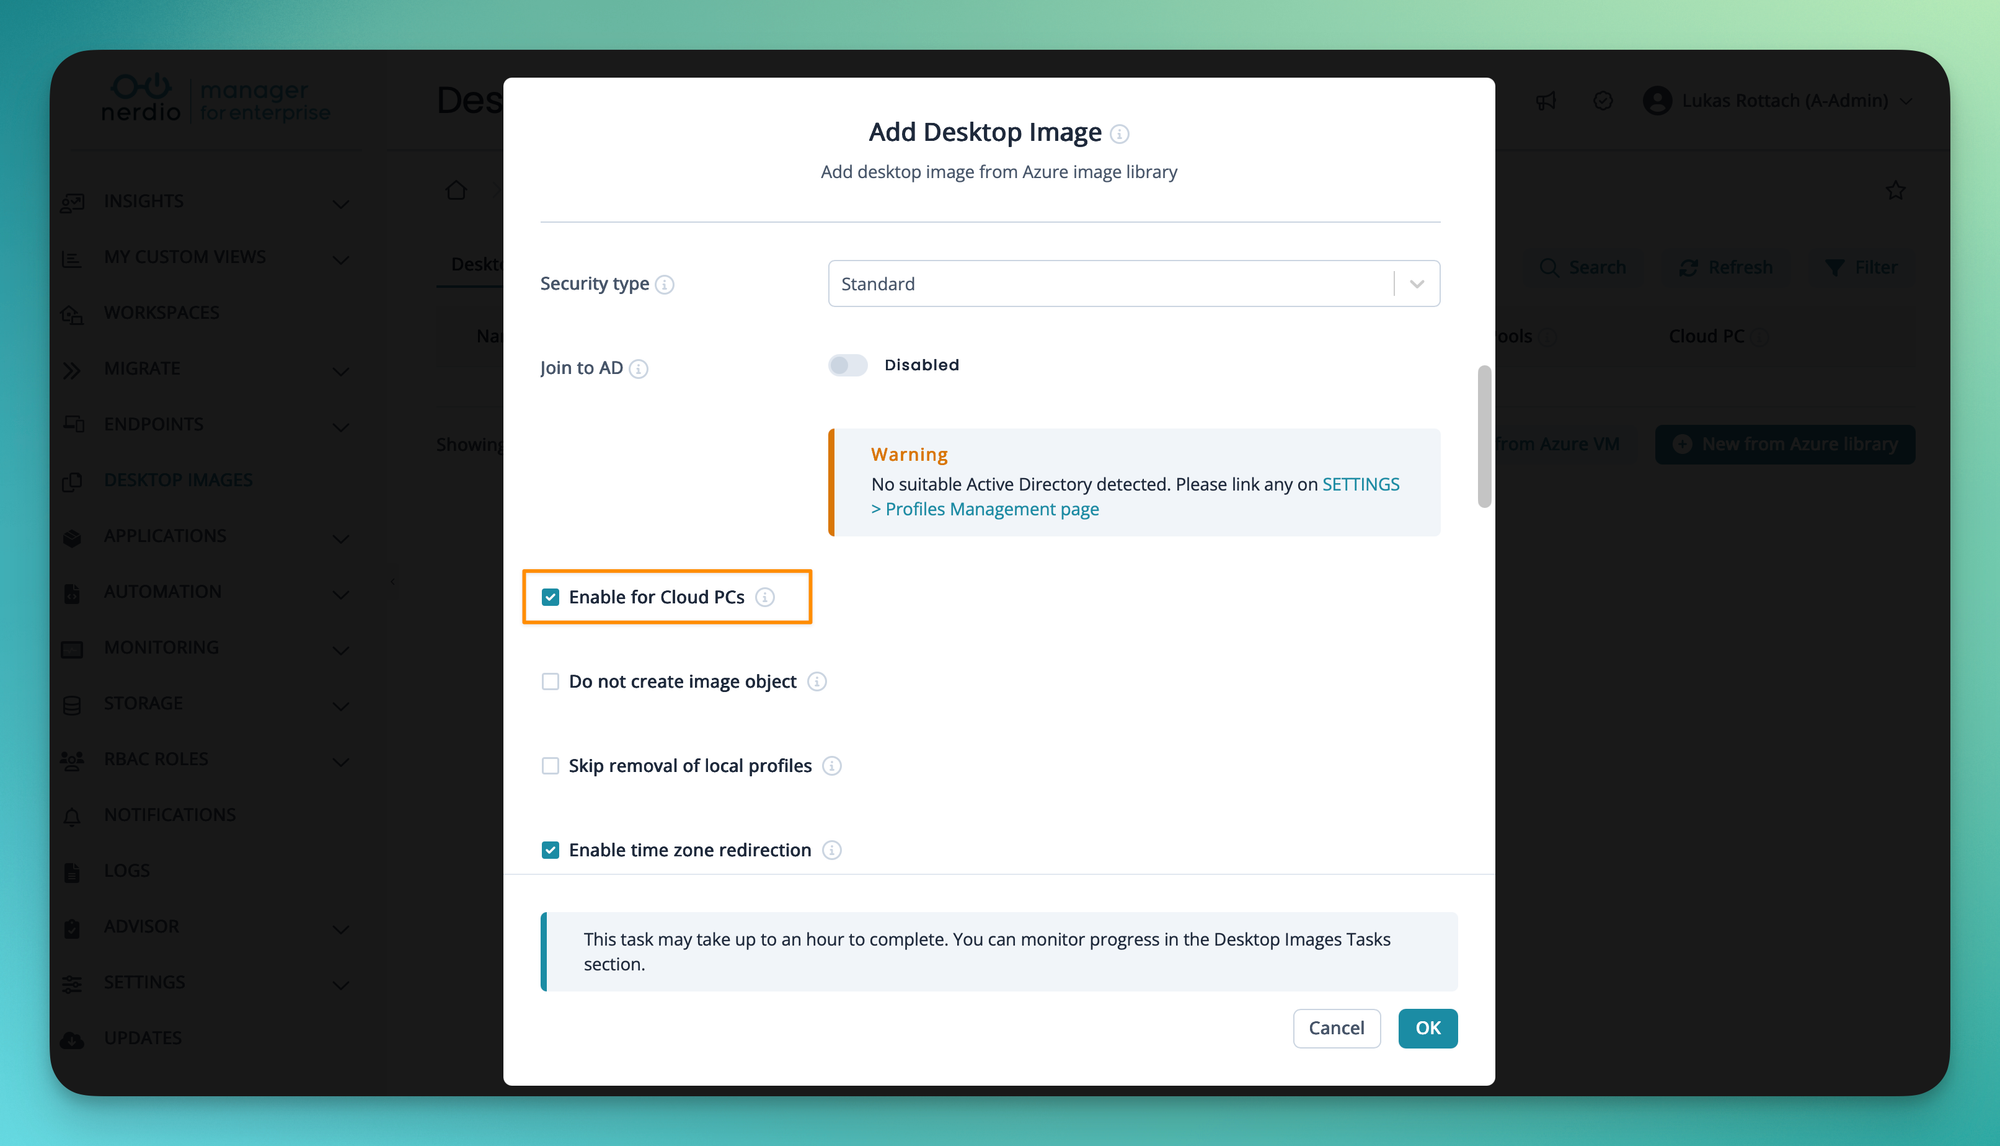
As soon as we click OK, the process kicks in. Keep in mind, that this can take quite some time. About one hour in my case.
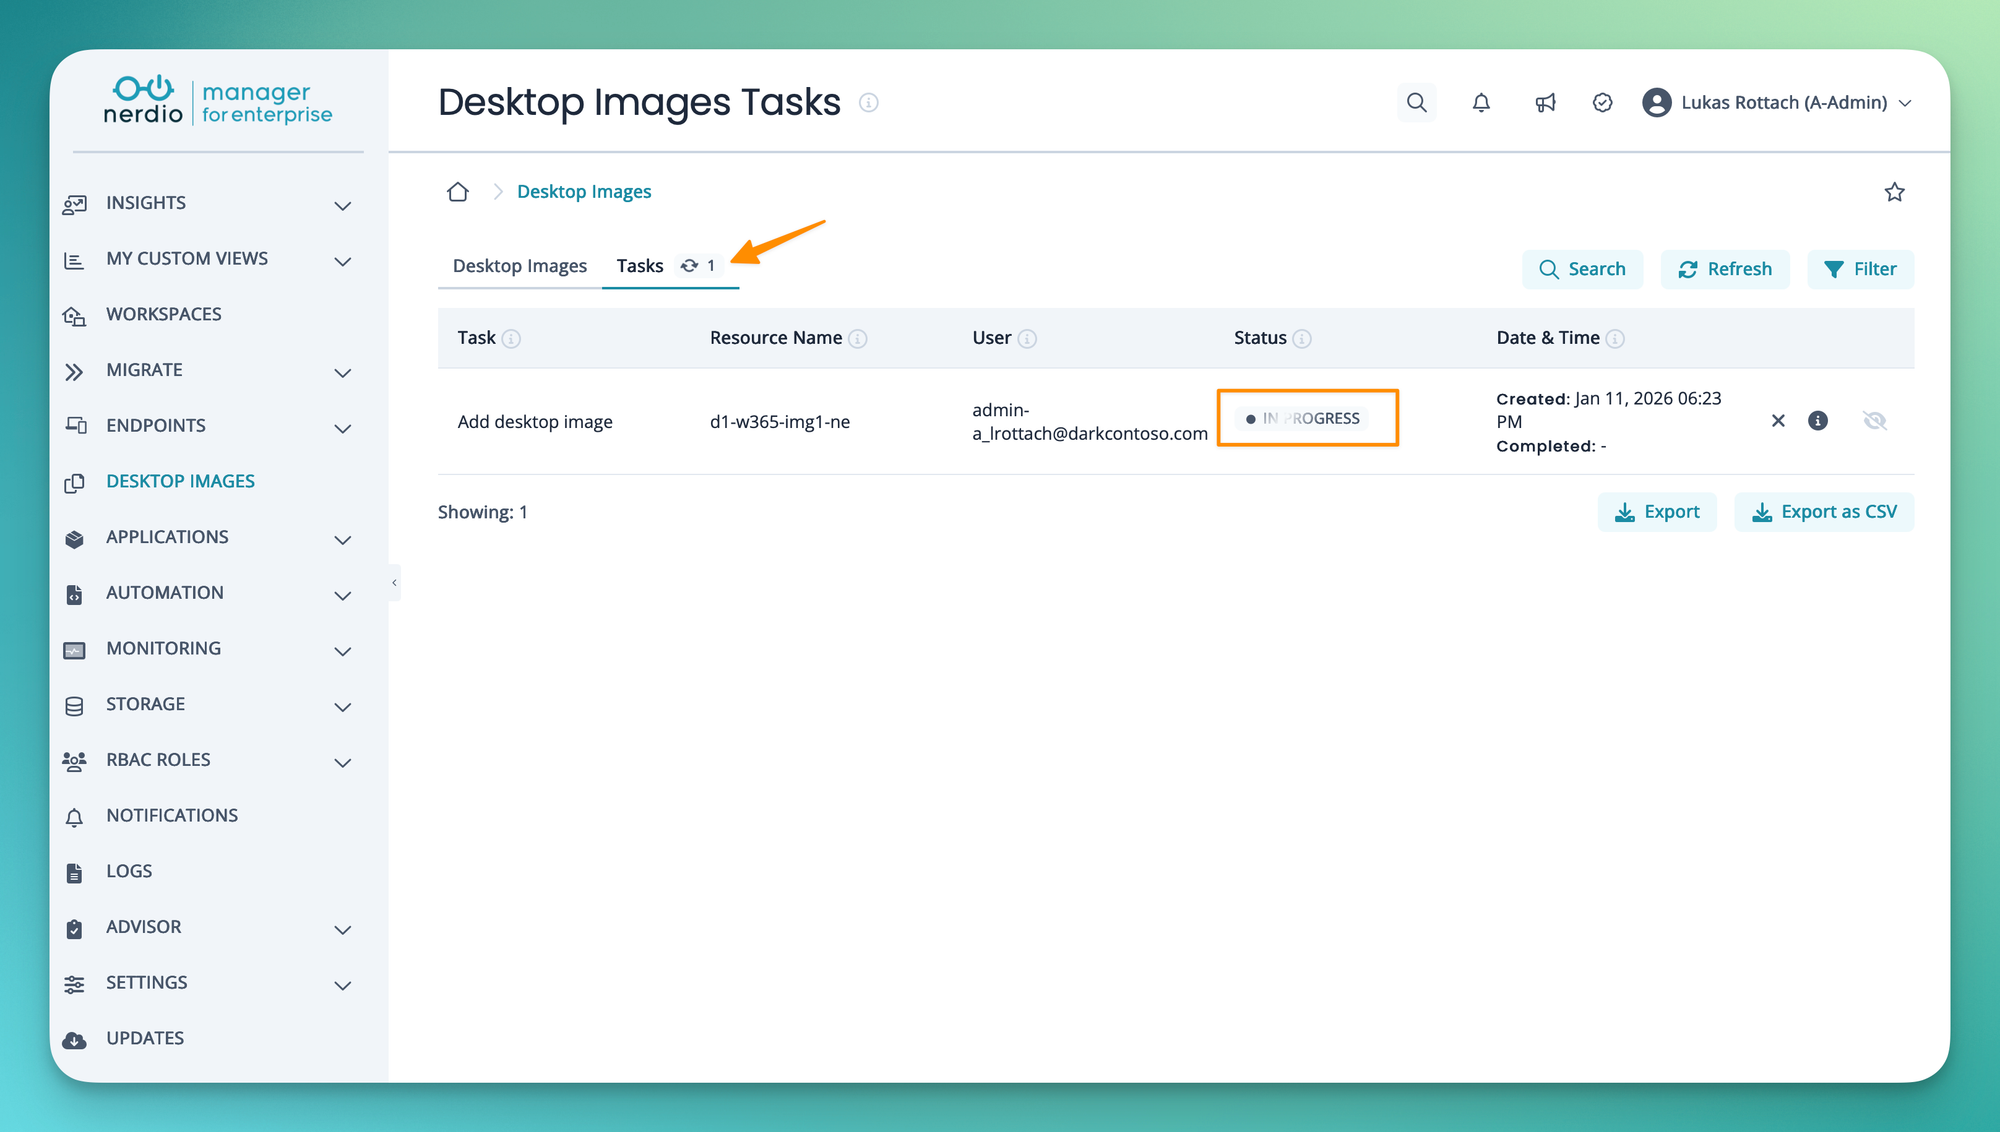
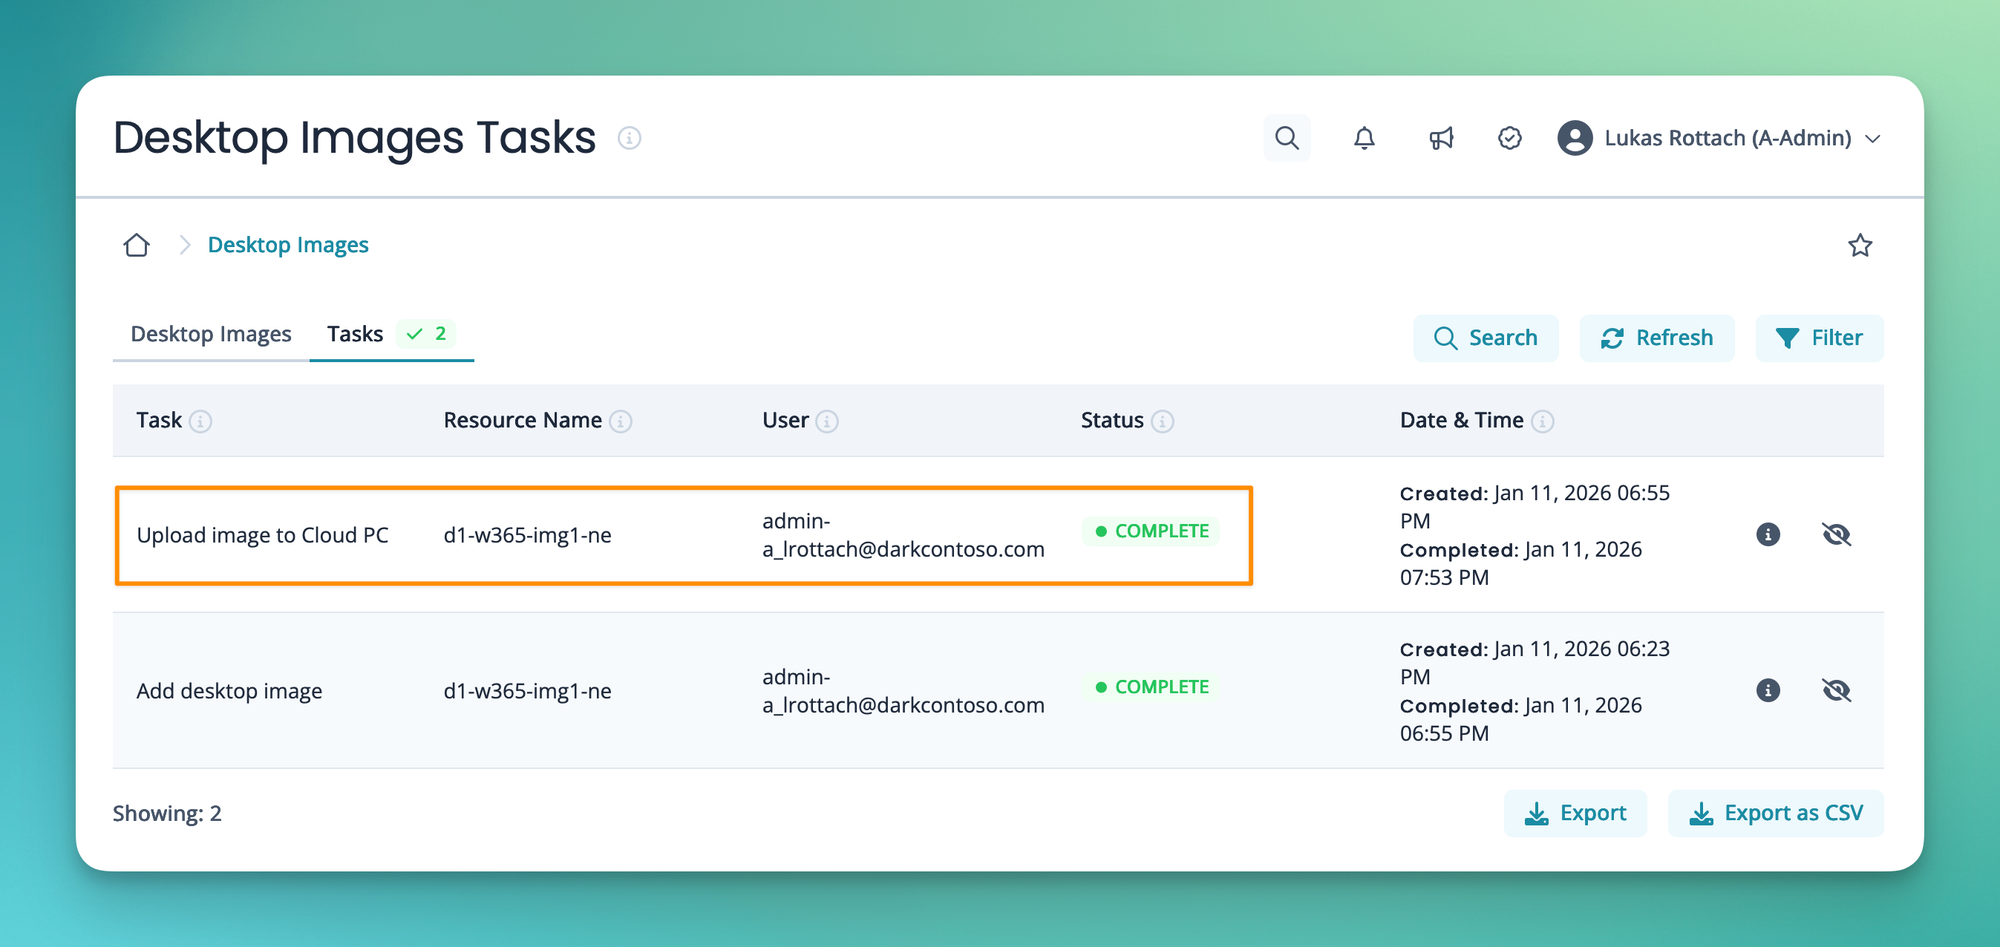
From the Nerdio tasks (logs) we can confirm that our image was prepared and already uploaded.
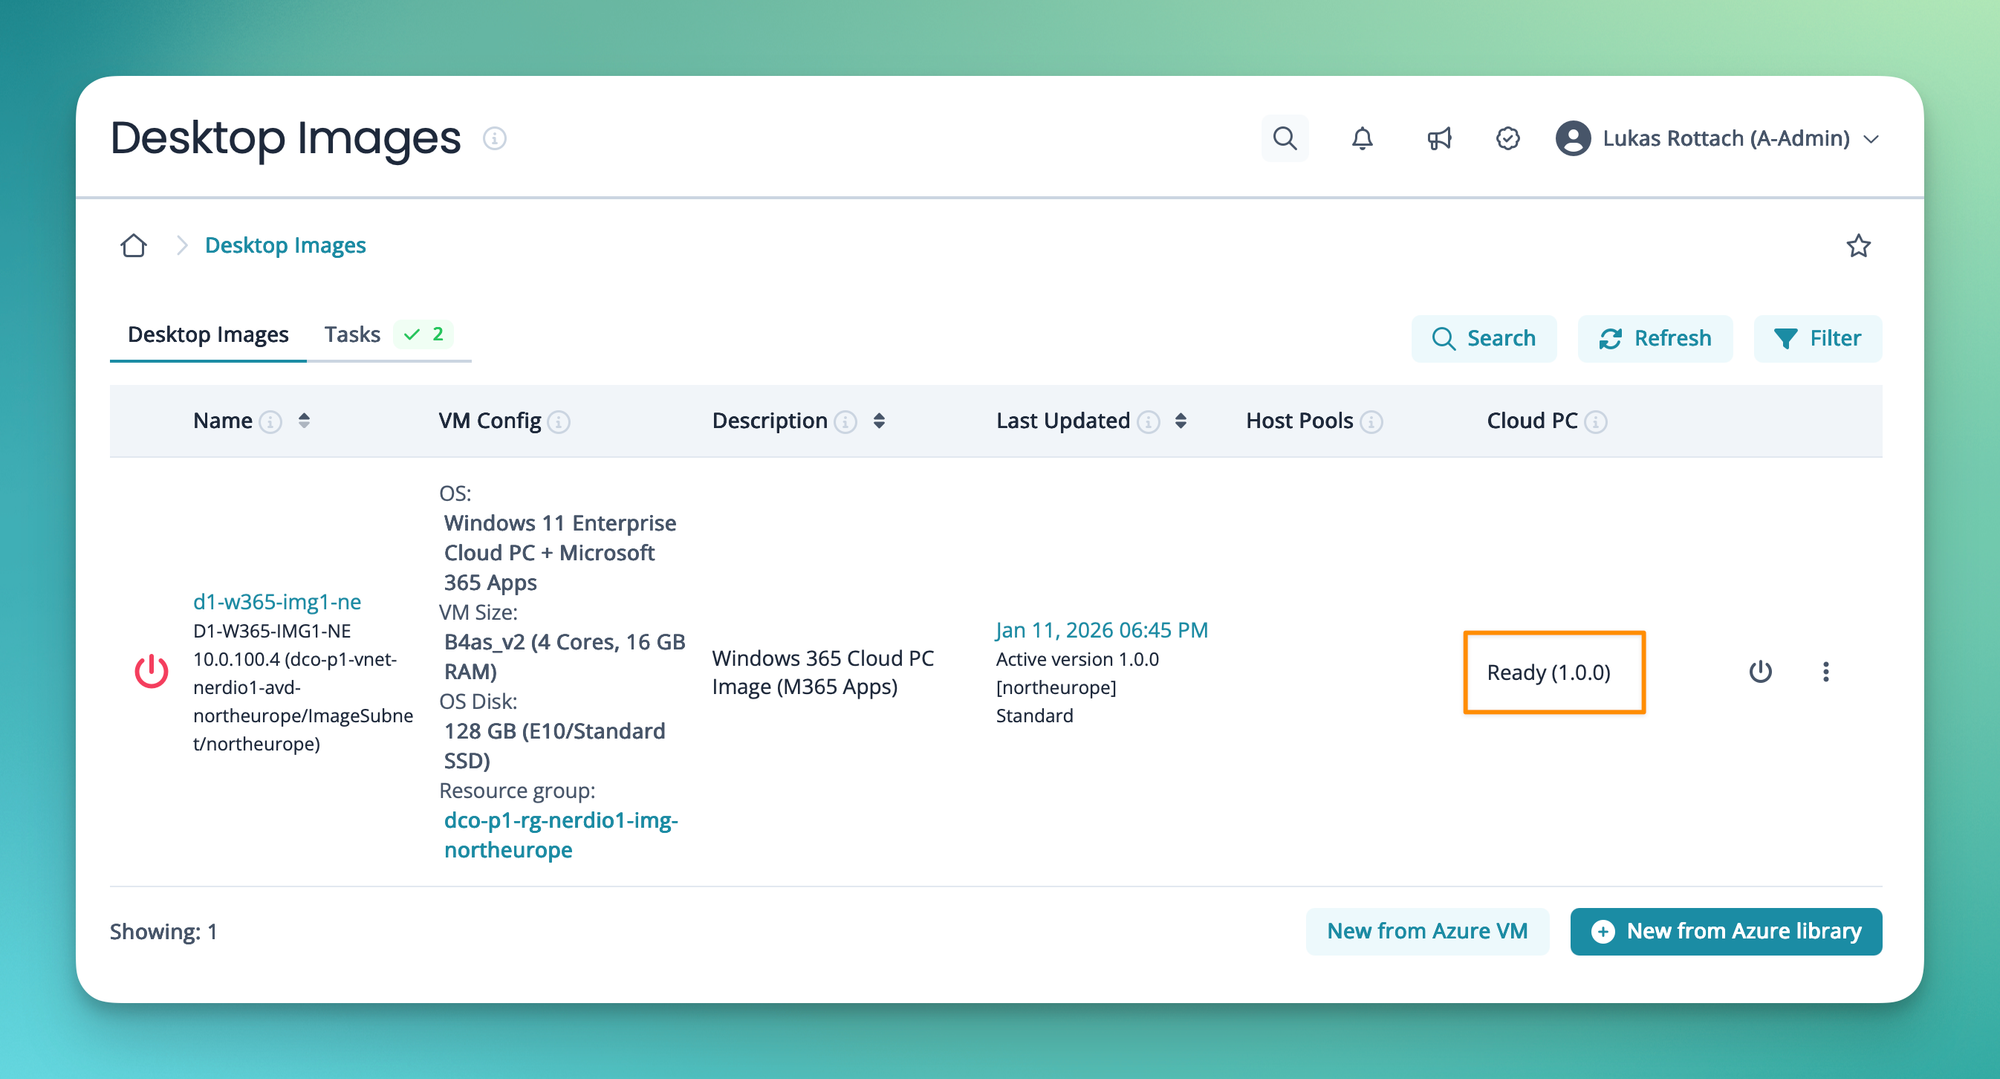
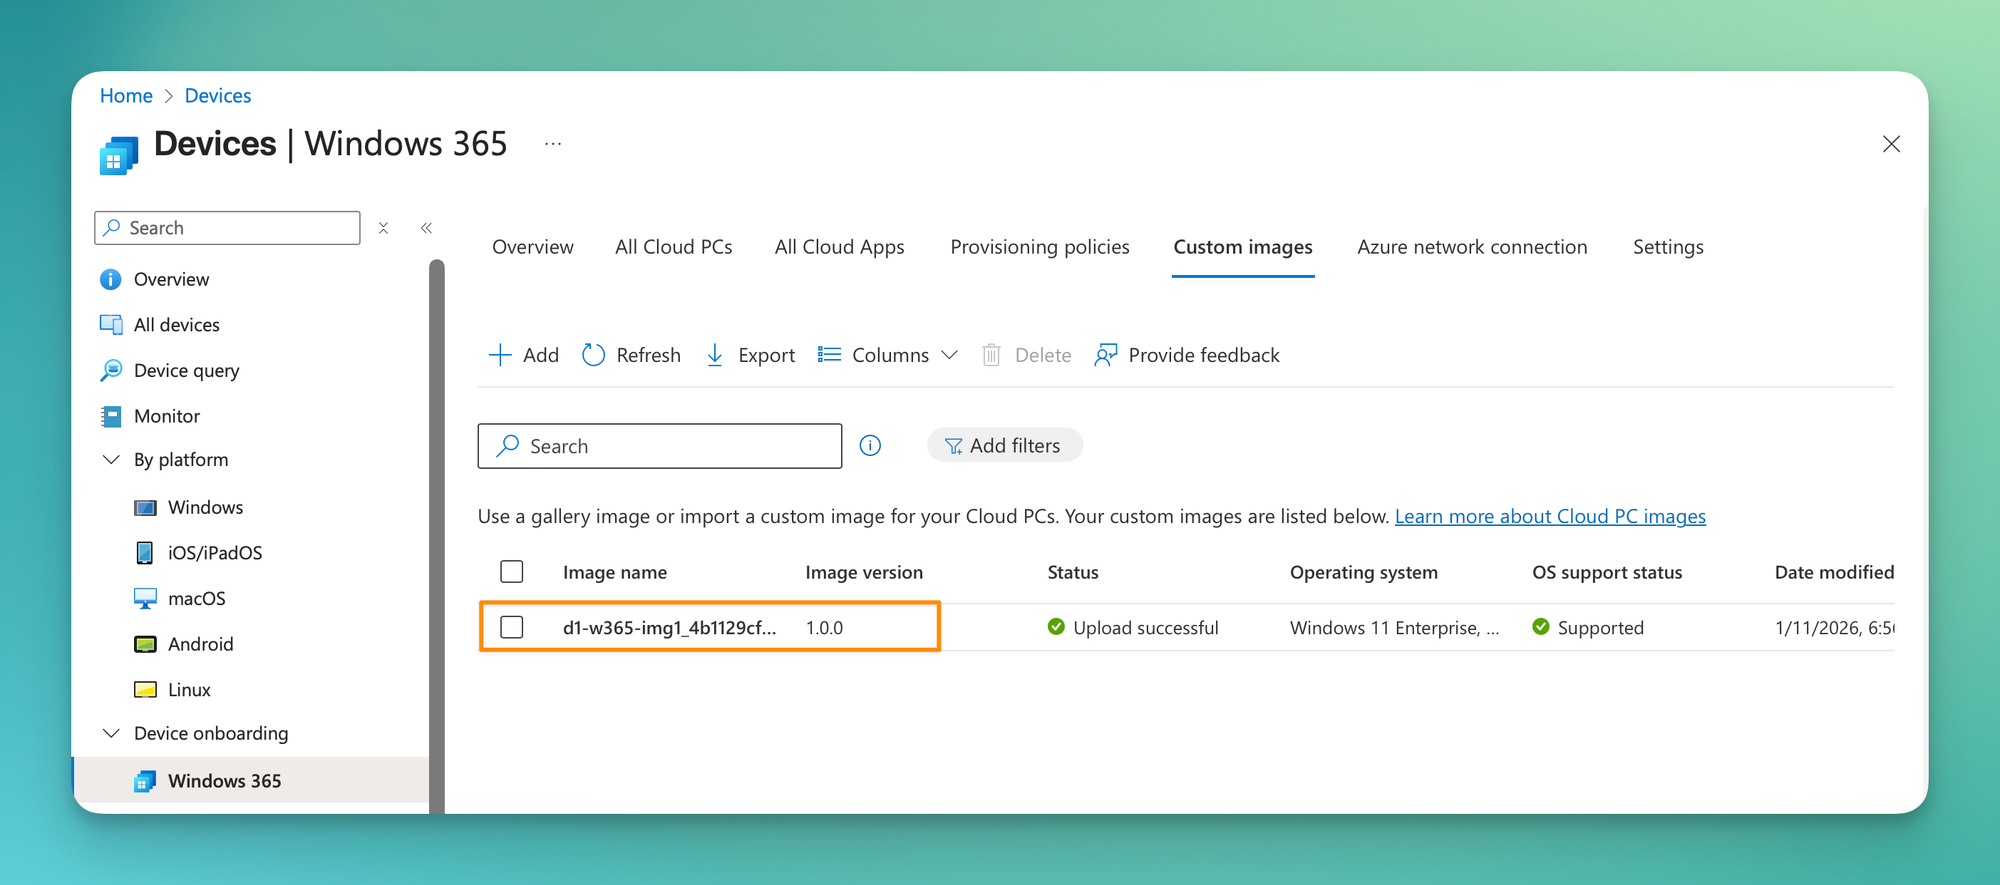
Here in the Desktop Images overview, it is also clear that our image is ready to be used for our Cloud PC. Currently as version 1.0.0.
If we take a look at the Microsoft Intune portal, we can confirm, that's true.
Create another image version
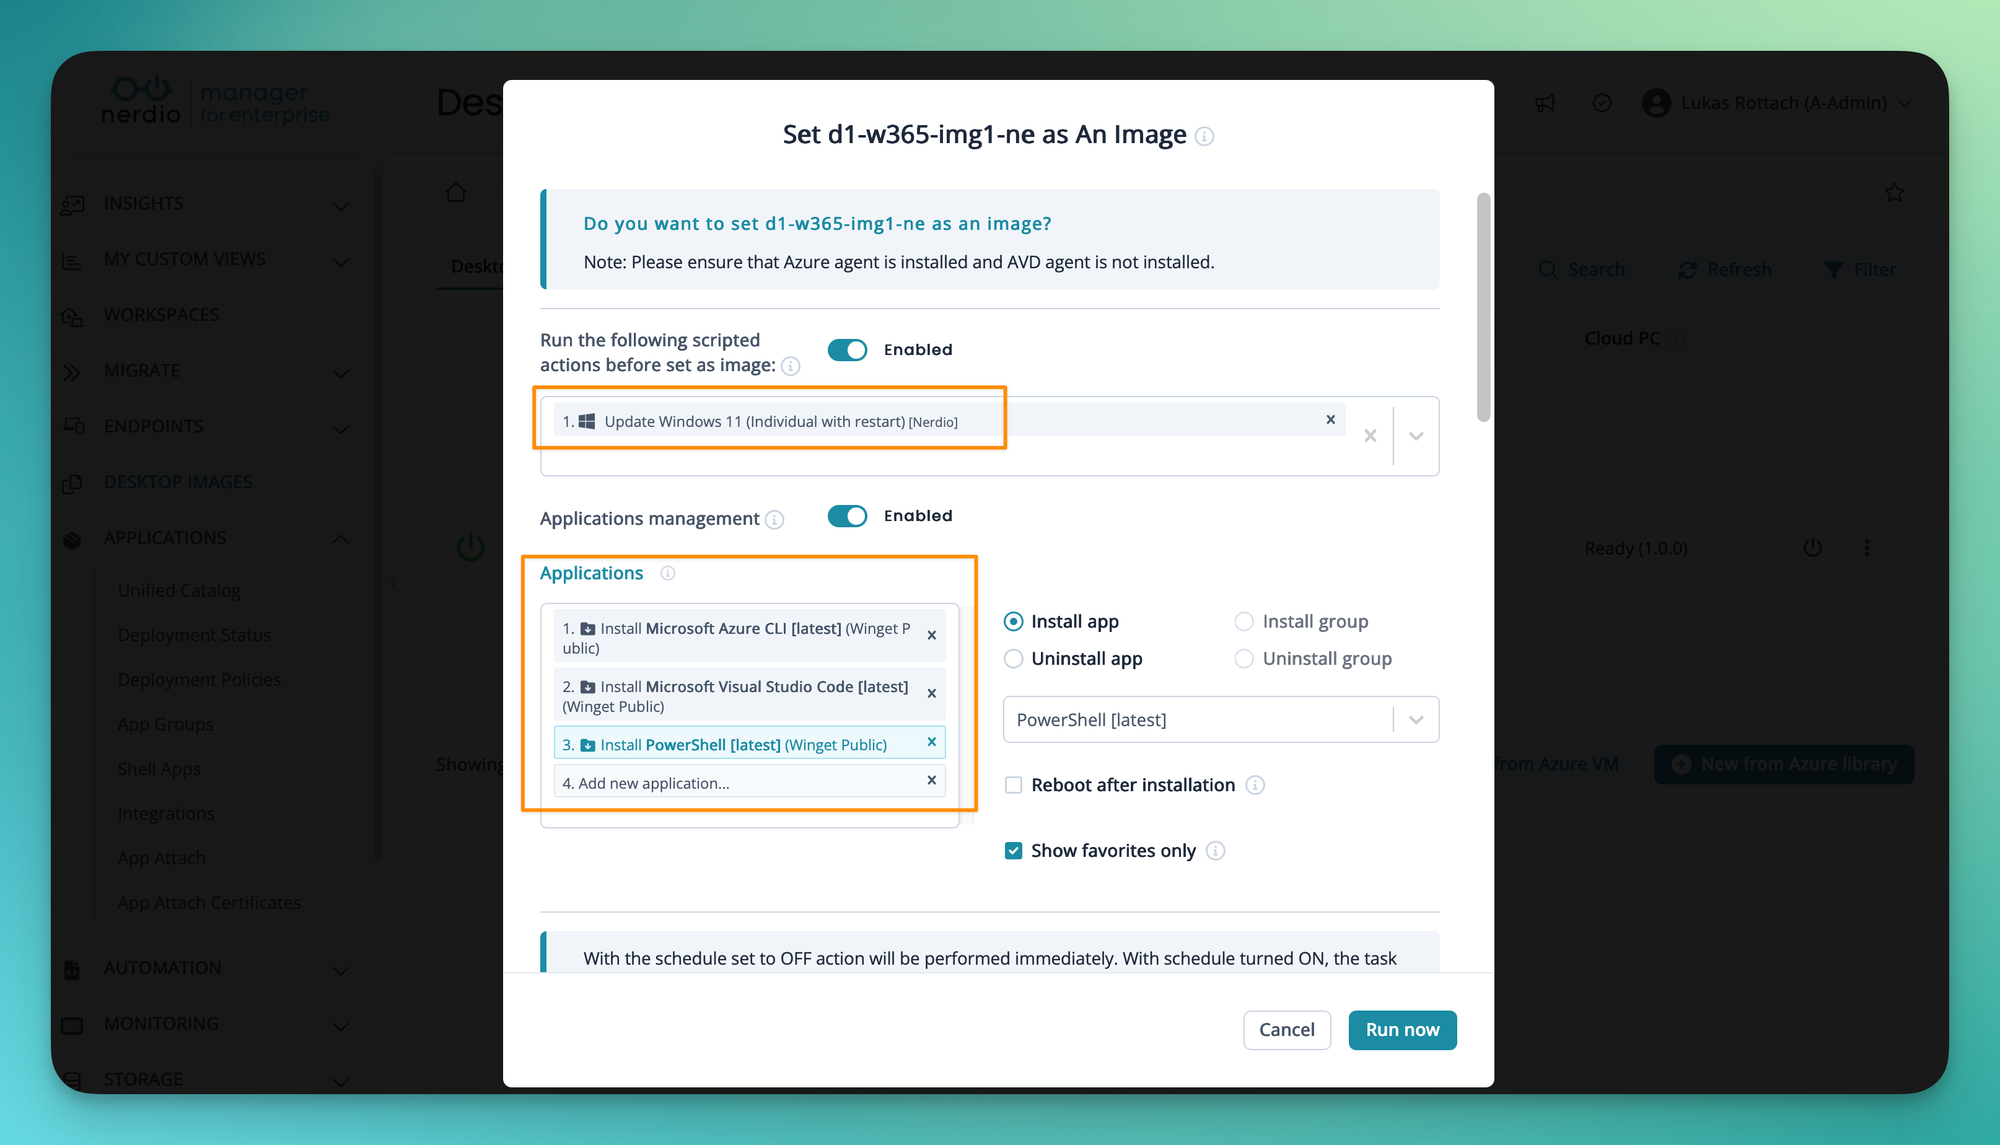
To round things up I am going to create another, updated version of our image. So, in Nerdio I've started the image VM again. In this case I want to apply some customizations to our image. To keep things simple, I've decided to use some of the Nerdio built-in actions and app installations.
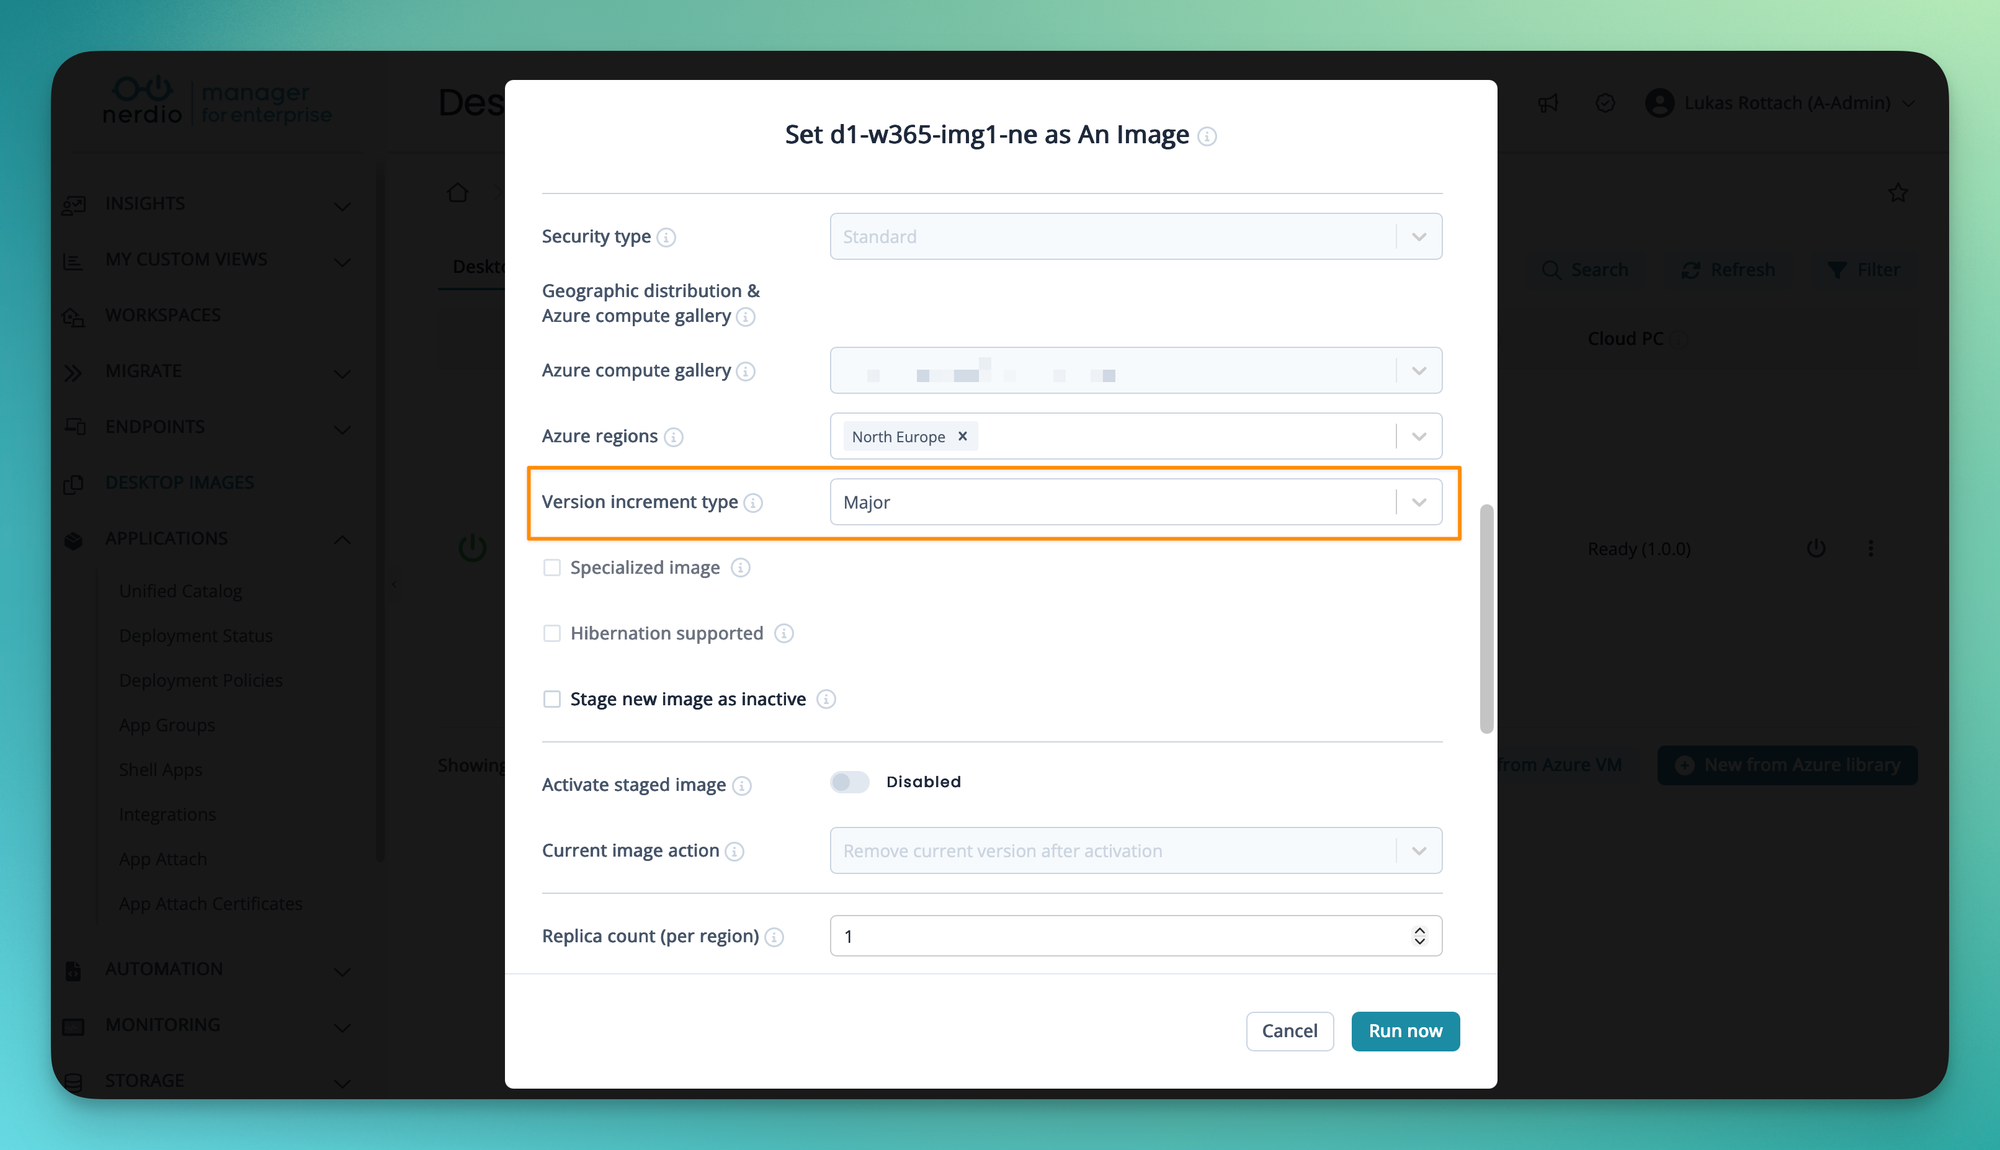
If we scroll down, we also have to choose the type of our version incrementation.
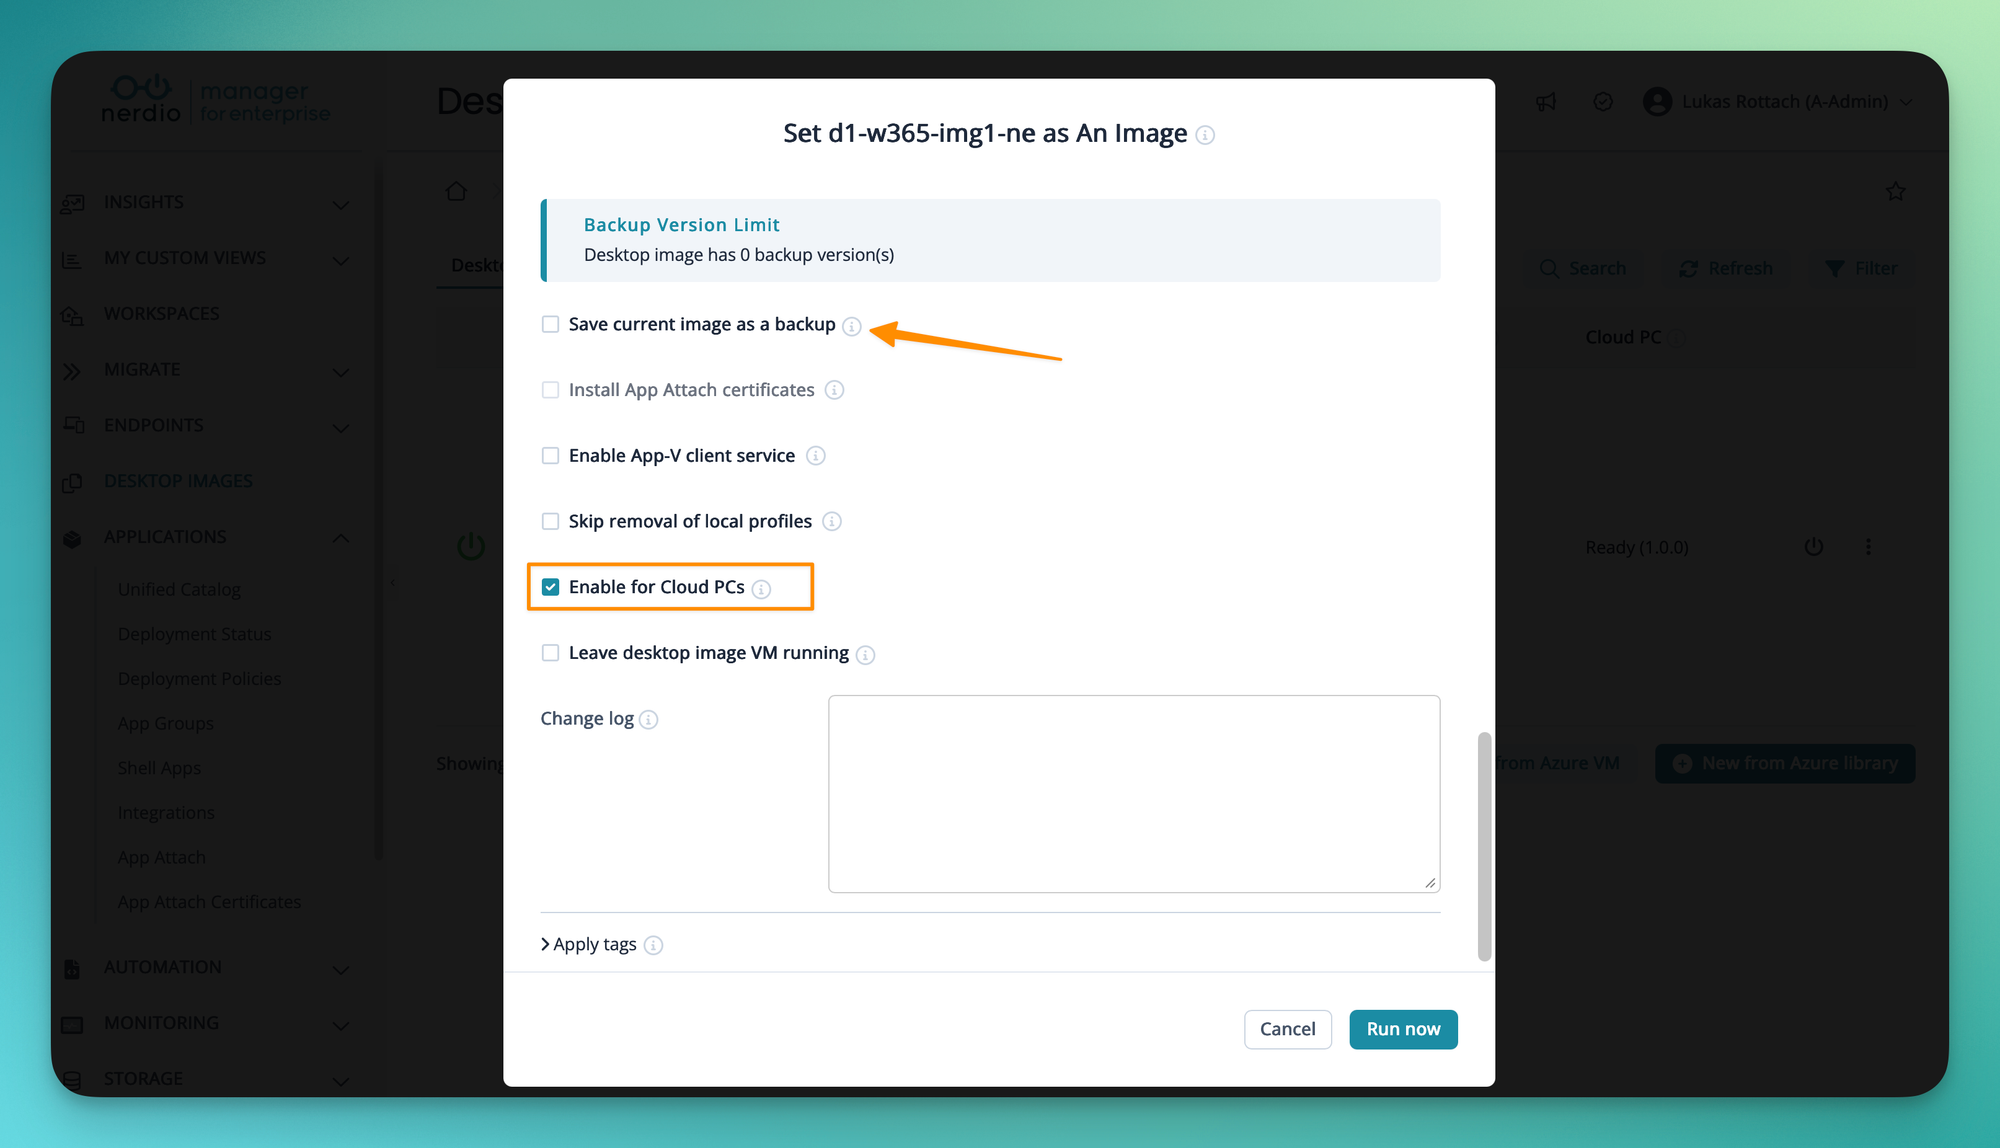
Here in this example, I've decided, that I want to keep the current image as a backup. Again, don't forget to make sure the Enable for Cloud PCsbox is checked.
And here we go. After another hour our image was built and uploaded. Now the version 2.0.0 is ready to be used in our provisioning policies.

Closing words
And that's it. With just a few clicks, Nerdio takes you from a marketplace image to a fully customized, versioned, and Intune-ready Cloud PC image. No scripts to maintain, no pipelines to debug.
What I personally appreciate most is how easy it is to iterate. Need to add an app or apply a new optimization? Just spin up the image VM again, make your changes, and publish a new version. The entire process stays structured and traceable without requiring any automation knowledge from your team.
If you're already running Nerdio Manager in your environment or not, give the image management a try. It might just save you a few hours every month.

Member discussion